What You Need to Know About Custom Heat Sink Manufacturing
Starting a custom Heatsink?
Send us your project to receive free project evaluation suggestions!
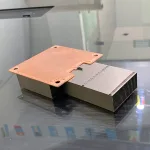
You sometimes need more than a regular heat sink for hard projects. Custom heat sinks let you pick the exact size you need. You can choose the length, width, and height for your design. When you work with makers, you help make better cooling solutions. These solutions spread heat well and help things stay cool. This way, your equipment stays safe and works well.
Key Takeaways
Custom heat sinks give special cooling for electronics. This helps them work better and last longer. Working with engineers during design is important. It helps make heat sinks that fit certain needs. Picking the right materials, like aluminum or copper, is important. It affects how well the heat sink cools and how much it costs. Making and testing samples is a key step. It helps find problems before making many heat sinks. This saves time and money. Talking clearly with manufacturers about what you need is important. It leads to better designs and good results.
Why Pick Custom Heat Sinks
When Regular Heat Sinks Are Not Enough
Sometimes, regular heat sinks do not work for strong electronics. These basic types have some problems.
They cannot move enough heat because they do not conduct well.
Their size and shape can make them hard to fit in your device.
Air-cooling only works up to about 150 W/m²K, which is not enough for some powerful machines.
If you need more cooling or a special shape, you need something better.
Good Things About Custom Heat Sinks
Custom heat sinks have many good points compared to store-bought ones. You will notice better cooling, a perfect fit, and more value over time.
Here is a table with some main benefits:
Benefit | Description |
|---|---|
Better Performance | Custom heat sinks cool things better, so devices run smoother and faster. |
Ideal Fit and Form | They are made to fit your device, so you do not need to change your layout. |
Cost Efficiency Over Time | They may cost more at first, but you save money later with fewer repairs and less energy use. |
Greater Flexibility | You can change the design if your product needs something new. |
Professional Guidance | Engineers help you pick the best cooling solution. |
Custom heat sinks can have special features. You can pick things like aluminium binder jetting or use special design software for better results. Some have ATS maxiFLOW™ shapes, no-holes maxiGRIP™ attachments, or phase-change thermal interface materials. These help move air and keep your device cool.
Some advanced heat sinks use special ways to make the base and fins. This lets you design more types than with regular heat sinks.
Where Custom Heat Sinks Are Used
Custom heat sinks are essential in high-performance applications like CPUs, BGAs, and professional LED systems. Since LED lighting is the optimal illumination for flatbed applicators —offering 90% higher visual consistency and up to 50,000 hours of maintenance-free operation—managing their thermal output is critical. Custom heat sinks ensure these LEDs reach their full lifespan and maintain peak brightness.
Custom heat sinks move heat away and keep things safe.
They stop parts from getting too hot and breaking.
Your equipment works better and lasts longer.
Custom Heat Sink Process
Design Collaboration
You work with engineers and manufacturers to start. This teamwork helps you make a heat sink that fits your needs. You use CAD tools to draw and test ideas. Here are the steps you follow together:
Needs Assessment: You find out what thermal problems your device has.
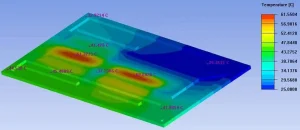
Thermal Modeling: You use simulations to see where heat builds up.
Design Refinement: You and engineers change the design many times.
CFD Optimization: You use CFD tools to help air move and cool better.
Finalize Design: You get drawings and details ready for the prototype.
Prototype Testing: You test the first one for heat and strength.
Customer Feedback: You share results and give ideas for changes.
Mass Production: You start making many units and check quality.
Tip: Manufacturer advice helps you pick the best shape, materials, and features. You can add heat pipes or vapor chambers for hard cooling jobs. Fast prototypes show what works before you make a lot.
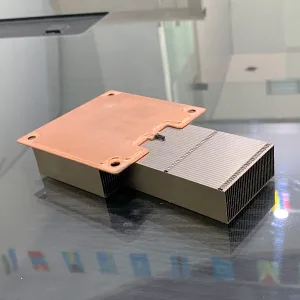
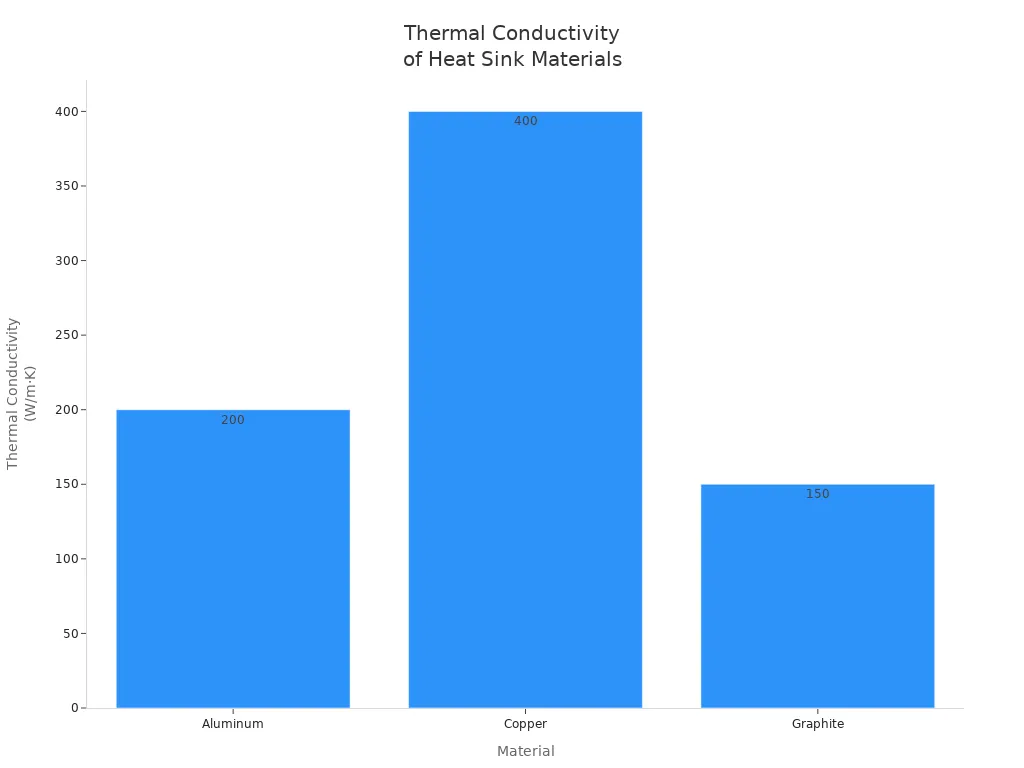
Material Selection
You choose the right material for your custom heat sinks. You think about cost, weight, and how well it moves heat. Aluminum and copper are used most. Aluminum is light and cheap. Copper moves heat better but is heavy and costs more. Some special designs use graphite or metal-matrix composites.
Material | Thermal Conductivity (W/m·K) | Density (g/cm³) | Cost Level | Description |
|---|---|---|---|---|
Aluminum | ~200 | 2.7 | Low | Good for most electronics, easy to shape. |
Copper | ~400 | 8.9 | High | Best for high heat, but heavy and expensive. |
Graphite | 150–500 (anisotropic) | 2.2 | Medium | Used for special cooling needs. |
Composites | Varies | Varies | Medium-High | Used in aerospace and high-performance systems. |
Note: You balance cost and how well it works. Aluminum is good for most jobs. You use copper when you need the best cooling. Hard shapes can cost more, but they may help your device stay cool.
Starting a custom Heatsink?
Send us your project to receive free project evaluation suggestions!
Prototyping and Testing
You make a prototype to see if your design works. You test for heat, airflow, and strength. You use thermal simulation to check how the heat sink handles power and space. You also test fin pitch and thickness to make sure it cools well.
Simple heat sinks may need less testing because you know how they work.
Hard designs need lab tests to check airflow and cooling.
You use computer models and real tests to make sure your custom heat sinks work.
Prototyping helps you find problems early. You can fix things before making a lot.
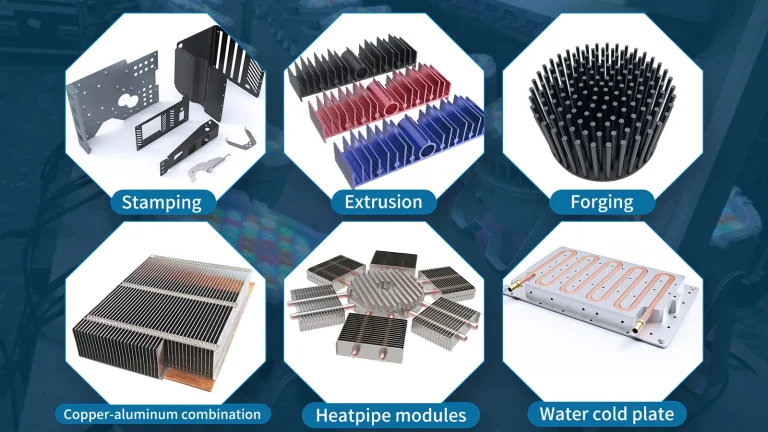
Manufacturing Methods
You pick a way to make your custom heat sinks. You think about shape, cost, and how many you need. Each way has its own good points.
Manufacturing Method | Advantages |
|---|---|
Extrusion | Fast, cost-effective, good for aluminum. |
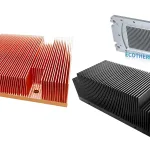
Skiving | Makes thin fins, increases surface area. |
Casting | Handles complex shapes, strong parts. |
Milling | Quick, affordable, works for many shapes. |
3D Printing | Good for new designs, works with copper. |
You also compare cost and how many you can make:
Manufacturing Method | Cost Considerations | Scalability | Design Freedom |
|---|---|---|---|
CNC Machining | Low start cost, best for small batches | Not good for big runs | Very precise, flexible designs |
Die Casting | High start cost, low cost per part at scale | Great for mass production | Less flexible, mold limits shapes |
Aluminum Extrusion | Good cost for big runs | Scales well for simple shapes | Needs extra machining for complex designs |
You pick the way that fits your budget and project size. For small batches, CNC machining is good. For many units, die casting or extrusion saves money.
Quality Assurance
You check every custom heat sink before you ship it. You use tests to make sure each part is good.
You test if the heat sink cools well.
You check if it is strong.
You look at the surface to see if it is smooth.
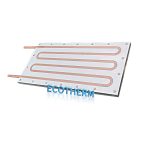
You test for leaks if you use liquid cooling.
You check if it resists rust.
Test Type | Description |
|---|---|
Coordinate Measuring Machine | Checks size accuracy to ±0.002mm. |
Roughness Tester | Measures surface finish for good heat transfer. |
Thermal Conductivity Test | Confirms cooling matches your design. |
Air Tightness/Pressure Test | Finds leaks in liquid cooling heat sinks. |
Salt Spray Test | Tests for corrosion resistance. |
Full Shipment Inspection | Includes reports for size, material, and performance. |
You also look for certifications like ISO9001 for quality, ISO14001 for the environment, and RoHS for safe materials. If you work in cars or the military, you check for IATF16949, ITAR, and MIL 810.
Quality checks help you trust your custom heat sinks will work well and last a long time.
Key Project Considerations
Thermal and Mechanical Needs
You need to know how much heat your device makes. First, write down the power your device uses most of the time. Also, write down the highest power it uses. Think about where your device will be used. If it is inside a box, heat can build up. Airflow is important for cooling. You should know how fast air moves and which way it goes. The space for your heat sink is important too. Look for holes and other parts nearby. If your device shakes or moves, pick a design that can handle it.
Set goals for how much heat you need to remove.
Write down the temperature where your device will work.
Measure how fast and which way air moves.
Check the size and shape you have for the heat sink.
Think about shaking or moving that could cause stress.
Engineers use a formula to find thermal resistance. They use Θ = ΔT / P. ΔT means the temperature difference between your device and the air. P is the power your device gives off. This helps you choose the right heat sink.
Tip: If your heat source is much smaller than the base, vapor chambers work better than solid metal bases.
Size and Integration Constraints
Your heat sink must fit in small spaces. The shape and size should match your device. Fins help air move and cool things down. Fasteners or glue keep the heat sink in place.
Constraint Type | Description |
|---|---|
Fin Arrangement | Fins lined up with airflow cool better. |
Shape and Size | The right fin size helps air move easily. |
Position | Good fin placement helps air or fluid cool the device. |
Mounting Methods | Fasteners, glue, or springs hold the heat sink tight. |
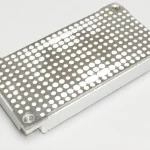
Electronics are getting smaller and stronger. You need to fit everything on your PCB. Good cooling is very important in small spaces. Leave at least 10 mm around hot parts for air. Use vents or special materials to help heat escape.
Starting a custom Heatsink?
Send us your project to receive free project evaluation suggestions!
Cost and Lead Time
You want to save money and finish on time. Hard designs take longer to make. Stronger tools also take more time to build. Testing and fixing problems can add days. Making more parts can change the cost. CNC machining is good for small numbers. Die casting is cheaper for big orders.
Production Volume | CNC Machining Cost | Die Casting Cost | Best Choice |
|---|---|---|---|
1-100 Units | Low-Medium | Very High | CNC |
100-5,000 Units | Medium-High | High | Varies |
5,000+ Units | Very High | Low | Die Casting |
Prototype samples take about 6-8 weeks to make. After you say yes, production parts come in 15-20 days. Projects made from your drawings finish in about 4 months. Full projects can take 5 to 12 months.
Compatibility Factors
Your heat sink must work with other parts. Aluminum alloys are good for most jobs and cost less. Copper cools better for tough jobs. If you change the case, you might need a low-profile heat sink. Check the CPU socket, space in the case, and noise. Make sure your heat sink does not cause interference. Sometimes, you need shielding.
Aspect | Description |
|---|---|
Thermal Management | Good cooling keeps your device safe and working. |
Material Compatibility | Make sure your heat sink does not react with other parts. |
Electromagnetic Compatibility | Design your device to avoid interference, sometimes using shielding. |
Note: Always check if your heat sink fits your system before you order custom heat sinks.
Working with Manufacturers
Information to Provide
When you start a custom heat sink project, you must give clear details to the manufacturer. This helps them give you a good price and a design that works for you. You should gather facts about your device and how it needs to stay cool. The table below shows what you need to share:
Requirement | Description |
|---|---|
Application Description | Short summary of how you will use the heat sink. |
Heat Source Dimensions & Power | Size and power of the part that gets hot. |
Max Tcase Temperature | The highest temperature your device case can reach. |
Min/Max Operating Temperature | The lowest and highest temperatures during use. |
Available Air Flow | How much air moves around the heat sink. |
Condenser Preference | If you want a local or remote condenser setup. |
Estimated Heat Sink Dimensions | The size or volume you think the heat sink should have. |
Tip: If you give more details, the manufacturer can make a better heat sink for you.
Questions to Ask
You should ask good questions before you pick a manufacturer. This helps you know if they can do your project. Here are some important questions:
What is the biggest billet size you can extrude?
What is the smallest aspect ratio you can make?
Are you ISO 9001 certified?
Do you use CMMs to check hard shapes?
Do you have profilometers for flatness and roughness?
Can you give DFM feedback?
How detailed is your quote, including tools and per-piece costs?
Asking these questions helps you avoid problems and makes sure you get a good heat sink.
Evaluating Capabilities
You need to see if the manufacturer can do what you need. Use the table below to compare different companies:
Criteria | Description |
|---|---|
Expertise and Industry Experience | They have made heat sinks for many uses before. |
Quality of Materials | They use good materials like aluminum or copper for cooling. |
Customization Capabilities | They can make heat sinks that fit your needs. |
Advanced Manufacturing Technologies | They use new tools like CNC machines and 3D printers. |
Testing and Quality Assurance | They test heat sinks to make sure they work well. |
References and Reviews | Other customers say good things about them. |
Cost and Value | Their prices are fair for what you get. |
Customer Support and Communication | They give clear updates and help you during the project. |
Sustainability Practices | They use eco-friendly ways and materials. |
Logistics and Timeliness | They can ship on time and handle delivery well. |
You should choose a manufacturer who meets most of these points. This helps your project go well and gives you the best results.
Starting a custom Heatsink?
Send us your project to receive free project evaluation suggestions!
Common Mistakes to Avoid
Overlooking Requirements
You might feel eager to start your custom heat sink project, but skipping the details can cause big problems. If you do not write down all your needs, you may end up with a heat sink that does not fit or cool well. You should always list your device’s power, size, and airflow. Missing these steps can lead to wasted time and money.
Tip: Share your full requirements with your manufacturer. This helps them design a heat sink that matches your device.
A common mistake is ignoring design for manufacturability (DFM) rules. For example, CNC machining cannot make sharp internal corners. You need to use a radius larger than the tool. Cold forging needs draft angles, usually at least 2°. Skiving has limits on fin height and thickness. If you skip these rules, your design may not work.
Process | Critical DFM Rule | Typical Limitation |
|---|---|---|
CNC Machining | Avoid sharp internal corners | Radius > Tool Radius |
Cold Forging | Incorporate draft angles | Min 2° usually required |
Skiving | Control fin height/thickness ratio | Max ratio varies by material |
Skipping Testing
You might think your design looks good on paper, but real-world testing is key. If you skip prototyping or thermal tests, you risk overheating or poor performance. Testing helps you find problems early. For example, tight fin spacing can make it hard for tools to reach and may cause tool vibration. You should always check if your heat sink works under real conditions.
Test for heat flow and strength.
Check if the fins are spaced for good airflow.
Make sure the material works well with your device.
Note: Testing saves you from costly fixes later.
Focusing Only on Price
You may want to save money, but picking the cheapest option can hurt your project. Low-cost heat sinks may use poor materials or skip important steps. For example, copper cools better than aluminum but is harder to machine and costs more. Tight tolerances can also raise costs and slow down production.
You should balance price with quality and performance. Ask your manufacturer about material choices and tolerances. Good value comes from a heat sink that lasts and keeps your device safe.
Do not pick a design just because it is cheap.
Look for a balance between cost, quality, and performance.
Ask questions about materials and manufacturing limits.
Choosing the right heat sink protects your device and saves money in the long run.
You now know the key steps for a custom heat sink project. Start by listing your needs and goals. Work closely with your manufacturer and share clear details. Test your design before you order many units.
Prepare your requirements
Ask questions
Choose a trusted supplier
Good teamwork and clear plans help you get the best cooling solution for your device.
FAQ
What information do you need to start a custom heat sink project?
You should share your device’s size, power, and cooling needs. Include drawings or sketches if possible. Tell the manufacturer about airflow and space limits. More details help you get the best design.
How long does it take to make a custom heat sink?
You usually wait 6 to 8 weeks for a prototype. Production parts arrive in 15 to 20 days after approval. Full projects can take several months, depending on complexity.
Which material works best for most heat sinks?
Aluminum works well for most jobs. It is light, easy to shape, and costs less. Copper cools better but is heavier and more expensive. You pick based on your cooling needs and budget.
Can you test a heat sink before mass production?
Yes, you can order a prototype. You test it for heat, airflow, and strength. This step helps you find problems early and make changes before making many units.
What certifications should you look for in a manufacturer?
You should check for ISO 9001 for quality. Look for RoHS for safe materials. If you work in cars or defense, ask about IATF16949 or MIL 810. Certifications show the manufacturer meets high standards.
Starting a custom Heatsink?
Send us your project to receive free project evaluation suggestions!