Which LED Heatsink Design Works Best for Your Project

The best LED heatsink design fits your project’s needs, space, and budget. Heat can hurt LED performance. It can make LEDs less efficient and change their color when it gets too hot. Studies show that if the temperature goes up by 10°C, the LED might last only half as long. Good thermal management is important. Using a led heatsink or active cooling can stop early failure. It also keeps the light steady. Passive heatsinks work for most normal setups. Active solutions are better for powerful or small spaces. Every project needs careful checking to pick the right one.
Key Takeaways
Picking the right LED heatsink keeps your LED cool. It helps your LED last longer. It also keeps the light bright and clear.
Aluminum heatsinks are cheap and work for most projects. Copper heatsinks are better for strong LEDs but cost more money.
Passive heatsinks work for most setups. Active cooling with fans or liquid is best for strong or small spaces.
Think about your project’s space, airflow, and how you will mount it. This helps you choose a heatsink that fits and cools well.
Use a step-by-step plan to figure out heat needs. Pick a heatsink that matches your LED’s power and where you use it.
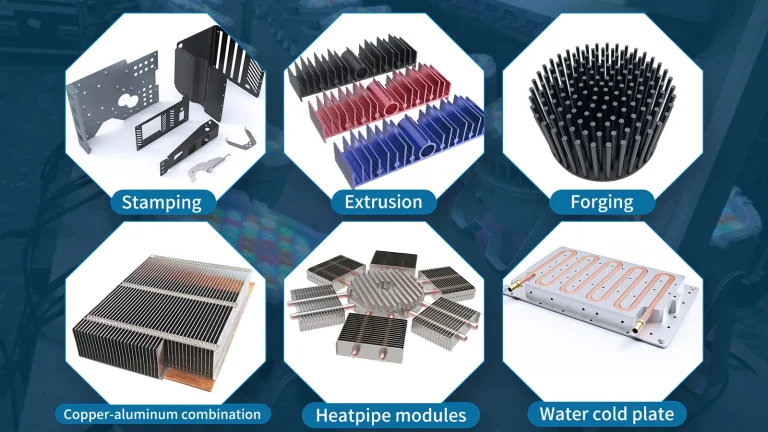
LED Heatsink Types
Passive Heatsinks
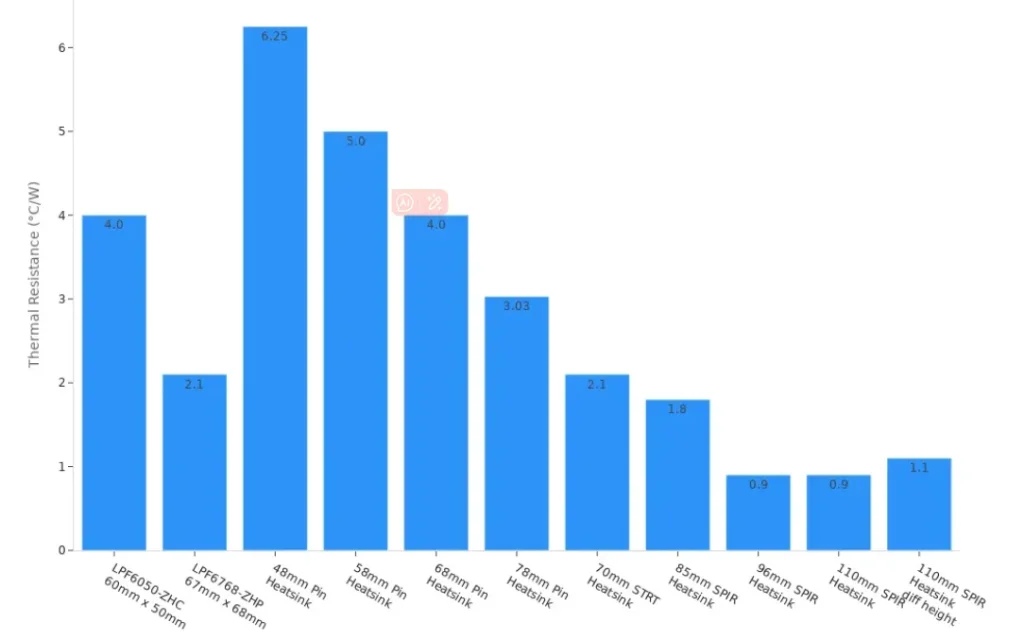
Passive heatsinks cool LEDs without any moving parts. They use conduction, convection, and radiation to move heat away. Most commercial and industrial lights use passive heatsinks made from aluminum. Aluminum is strong and does not need much care. These heatsinks are good for outdoor lights and places where things must work well. The size and shape of a passive heatsink matter for cooling. Bigger heatsinks with more surface area cool better. Thermal resistance for passive heatsinks can be as low as 0.9°C/W for big spiral types. Smaller pin designs can have up to 6.25°C/W thermal resistance.
Active Heatsinks
Active heatsinks use fans or pumps to move air or liquid. This helps the heatsink cool high-power LEDs better. Active cooling is great for small spaces or powerful lights where passive cooling is not enough. These systems can change fan speed or pump rate to keep things cool. But active heatsinks need power, make noise, and must be checked often.
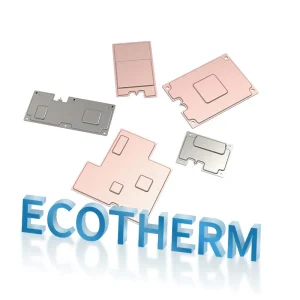
Common Materials
Aluminum is the most used material for a led heatsink. It is cheap, light, and cools well. Copper cools even better but costs more money. Some heatsinks use ceramics or steel for special reasons. Aluminum is best for most lights. Copper is used for high-power or industrial lights.
Material | Thermal Conductivity (W/mK) | Key Characteristics and Usage |
|---|---|---|
Aluminum | Moderate | Lightweight, cost-effective, corrosion-resistant |
Copper | Nearly double aluminum | Superior heat transfer, higher cost |
Ceramics | Similar to aluminum alloys | Used for electrical insulation, brittle |
Steel | 16-67 | Strong, less heat transfer, used for structure |
Finned and Other Designs
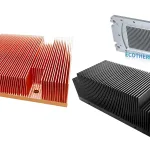
Finned heatsinks have thin metal fins to make more surface area. This helps them cool better. Radial and pin-fin designs spread heat out and lower thermal resistance. Perforated fins and special shapes, like dimples, can cool up to 45% better than solid fins. Custom fin setups, like different densities or fins pointing up, help airflow and cooling. These new designs let engineers make led heatsinks that work well for any project.
Quick Comparison Table
Performance Overview
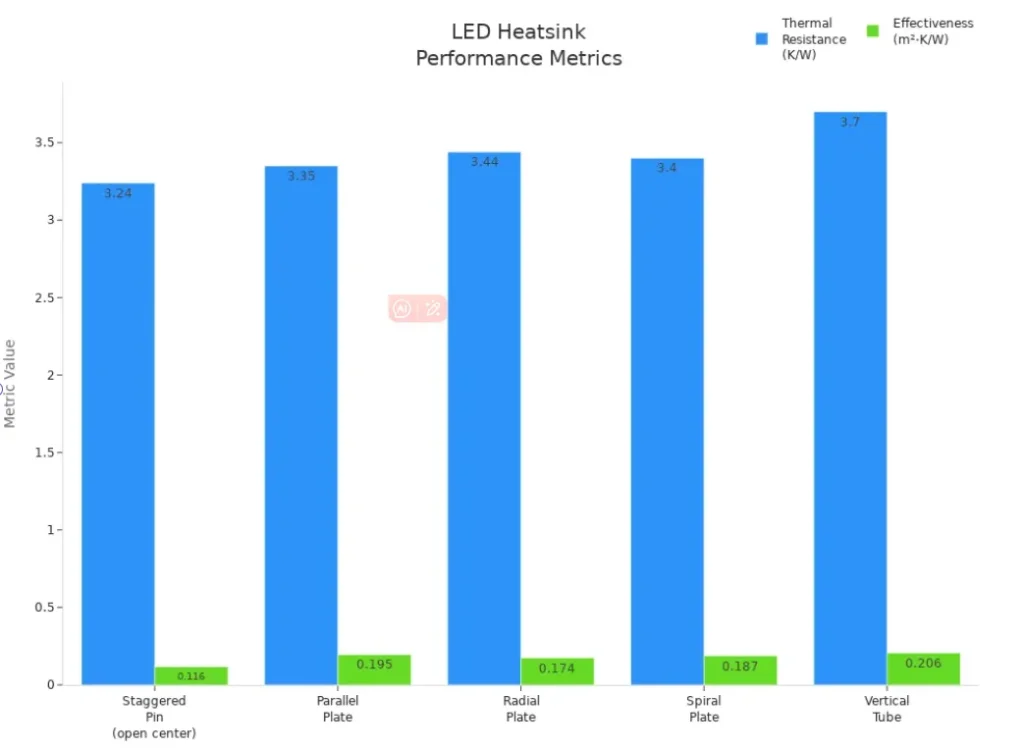
Engineers check two things when picking LED heatsinks. They look at thermal resistance and how well the heatsink works. Thermal resistance shows how fast heat leaves the LED. Lower numbers mean the heatsink cools better. Effectiveness tells how much of the surface helps with cooling. Both numbers help engineers choose the best heatsink for each project.
Heatsink Type | Thermal Resistance (K/W) | Effectiveness (m²·K/W) | Key Observations |
|---|---|---|---|
Diagonal Plate | 3.21 | N/A | Best cooling due to open fin spacing and smooth airflow |
Staggered Pin (open center) | 3.24 | 0.116 | High effectiveness, improved airflow by removing center pins |
Parallel Plate | 3.35 | 0.195 | Moderate cooling, less efficient use of surface area |
Radial Plate | 3.44 | 0.174 | Good airflow from all directions, better effectiveness |
Spiral Plate | 3.40 (approx.) | 0.187 (approx.) | Slightly lower resistance, but less effective surface area use |
Vertical Tube | 3.70 | 0.206 | Least effective, poor airflow and heat transfer |
Note: You need to look at both numbers. One number alone does not tell you everything. Both are important for custom heatsink design.
Application Suitability
Different heatsinks work best for different projects. Aluminum extrusions are good for low or medium power LEDs. They are not heavy and do not cost much. Die-cast aluminum heatsinks are stronger and can cool bigger LEDs. Copper heatsinks are best for high-power LEDs. They move heat away very fast. Fan-cooled and liquid-cooled heatsinks are used for the most powerful LEDs.
Heatsink Type | Material | Suitable Power Range | Cooling Mechanism | Application Examples | Advantages and Notes |
|---|---|---|---|---|---|
Aluminum | Low to Medium Power | Passive (natural convection) | Residential, commercial lighting | Lightweight, cost-effective, easy to customize | |
Aluminum Die-Cast | Aluminum | Medium to High Power | Passive or fan-cooled | High-power LED fixtures | Strong, complex shapes, better cooling |
Copper Heat Sink | Copper | High Power | Passive, fan, or liquid | Industrial, high-performance lighting | Superior heat transfer, durable, best for custom high-power needs |
Fan-Cooled Heat Sink System | Aluminum/Copper | Medium to High Power | Forced convection (fan) | Industrial, stage lighting | Enhanced cooling, needs maintenance, some noise |
Various | Extremely High Power | Liquid cooling | Data centers, large LED displays | Top cooling, complex, costly, for extreme cases |
Tip: Pick a heatsink that matches your LED’s power and space. The right choice helps your LED last longer and work better.
Choosing the Right LED Heatsink
Assessing Thermal Needs
Every LED project starts by figuring out how much heat it makes. LEDs get hot inside their parts. If the heat stays trapped, it can hurt the LED and its coating. A good thermal design keeps the LED cool and safe. Engineers use rules like IESNA LM-79, LM-80, LM-82, and TM-21 to check how well LEDs handle heat. Following these rules helps the LED last longer and work well.
Many things change how much cooling is needed:
How much heat the LED makes when it is on.
The chance that heat will hurt important parts.
Keeping the LED and other electronics apart to stop extra heat.
Checking the test point temperature (Tc) to know how much cooling is needed.
The difference between Tc and the air temperature (Ta) gives more ways to cool.
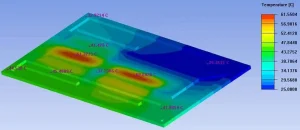
Engineers also look at things like humidity, current, voltage, and chemicals. They check thermal resistance, spreading resistance, and what the LED fixture is made of. Computer programs like CFD help them see how heat moves. These tools let engineers try different heatsink shapes and materials before building anything. This saves time and money and helps them pick the best led heatsink for each job.
Tip: Always check your LED’s junction temperature. High heat can change the light’s color and make it not last as long.
Space and Mounting
How much space you have matters when picking a heatsink. Some projects have little room, while others have more space. The width, height, and depth of the fixture decide what heatsink fits. Slim profiles fit under cabinets or in small spots but only give basic cooling. Standard profiles work for most lights and balance size with cooling. Deep profiles cool better but need more space.
Profile Type | Internal Width (mm) | External Dimensions (W x H, mm) | Typical Applications | Notes |
|---|---|---|---|---|
Slim Surface | 8-12 | 15-18 x 6-8 | Under cabinets, accent lighting, tight spaces | Simple look, basic cooling, may show LED dots with clear cover |
Standard Surface/Recessed | 10-15 | 17-25 x 8-15 | General purpose, cove lighting, furniture integration | Good size, spreads light, and cools well |
Deep Recessed/Surface | 10-20 | 17-30 x 15-30+ | Architectural lighting, dotless linear fixtures | Better light spread and cooling, needs more room |
Wide Profiles | 20+ | 30+ x 10+ | Housing multiple LED strips, broader fixtures | Brighter lights, bigger look |
How you mount the heatsink also matters. Some use clips, screws, or sticky tape. Each way changes how well the heatsink touches the LED and how much space it uses. Good contact helps heat move from the LED to the heatsink. In small spaces, engineers use special clips or thin tape to save space. They also think about how the heatsink looks and keeps the LED safe.
Airflow Considerations
Air moving around the heatsink helps it cool the LED. Sometimes air moves on its own. Other times, fans or pumps push air or liquid over the heatsink. Picking between natural and forced convection changes the heatsink’s size and shape.
Airflow Condition | Heatsink Design Considerations | Heatsink Types & Features |
|---|---|---|
Natural Convection | Needs passive heatsinks with big surfaces and special fins. How you place it and room temperature matter. | Extruded heatsinks with different fin shapes, best for low-power and low-airflow spaces. |
Forced Convection | Lets you use smaller heatsinks. Fans or liquid cooling can be used. Design must match airflow path. | Bonded or skived fin heatsinks with more fins and lower thermal resistance; active heatsinks with fans for high power. |
Other things matter too, like the type and speed of the air or liquid, the room temperature, and how the heatsink is put in. Engineers use special materials and heat spreaders to help heat move from the LED to the heatsink. In custom jobs, airflow tests help pick the right led heatsink design.
Note: Passive heatsinks need more space and surface area if there is not much airflow. Active heatsinks work better in small or high-power places.
Cost Factors
Cost is always important when picking a heatsink. Copper cools best but costs more. Aluminum is cheaper and cools well enough. Most projects use extruded aluminum heatsinks because they cool well and cost less. You can make custom shapes with extrusion to fit special needs without spending too much.
Project managers also think about mounting, repairs, and how long the heatsink will last. A cheap heatsink may save money at first but can cause the LED to fail early and cost more later. Good cooling keeps the LED safe, stops breakdowns, and protects the system.
Picking the right heatsink means balancing cooling, safety, and price. For most LED projects, a good aluminum heatsink does the job and helps the lights last longer.
Pros and Cons of LED Heatsink Designs
Extruded
Extruded heatsinks are made by pushing aluminum through a shaped mold. This makes long pieces with fins that help move heat away from LEDs. Many custom led heatsink designs use this method because it is not too expensive and works well. The table below lists the main points:
Aspect | Pros | Cons |
|---|---|---|
Material | Lightweight, cost-effective, good thermal conductivity | Lower conductivity than copper |
Manufacturing | Fast, consistent, flexible for shapes; low per-unit cost | High upfront tooling cost; limited fin density/geometry |
Thermal Performance | Fins run full length for good heat dissipation | Not for extreme cooling needs |
Design & Durability | Durable, can add mounting features, strong | Limited to shapes that fit through the die |
Tip: Extruded heatsinks are a good choice for most LED projects. They give good cooling and do not cost too much.
Cast
Cast heatsinks are made by pouring melted metal into a mold. This lets them have special shapes and small details. Cast heatsinks are good for projects that need unique designs or fit in tight spaces.
Aspect | Die Cast LED Heatsinks | Extruded LED Heatsinks |
|---|---|---|
Manufacturing | Complex shapes, high precision, costly tooling | Simpler shapes, lower cost, fast |
Design Flexibility | High | Limited |
Cost | Higher | Lower |
Heat Dissipation | Lower (ADC12 alloy ~96 W/mK) | Higher (AL6063 alloy ~200 W/mK) |
Cast heatsinks can be made in many shapes but may not cool as well as extruded ones.
Forged
Forged heatsinks are made by pressing metal into shape. This makes them strong and helps them cool well. They are used for high-power LEDs like streetlights and stadium lights.
They have high thermal conductivity because of their grain structure.
They can be made in special shapes for better airflow.
They are light and small, with no extra parts needed.
They save money when making many at once and waste less material.
They are tough and last a long time, even in hard places.
They are quiet and usually do not need a fan.
They can look nice too.
Forged heatsinks keep LEDs cool and working for a long time, even in rough places.
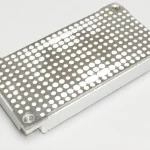
Pin Fin
Pin fin heatsinks have lots of small pins instead of flat fins. This design works well when fans blow air over the heatsink.
Pin fin heatsinks cool better than plate fins when fans are used.
The pins make more pressure, but this is not a problem with strong airflow.
Air can come from any direction, so pin fins work where airflow changes.
With fans, pin fins cool LEDs better than in still air.
Plate fins cost less and are good for natural airflow, but pin fins are better with fans.
Pin fin heatsinks are great for custom led heatsink projects that need strong cooling and changing airflow.
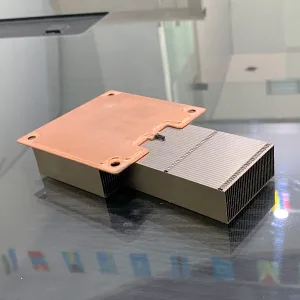
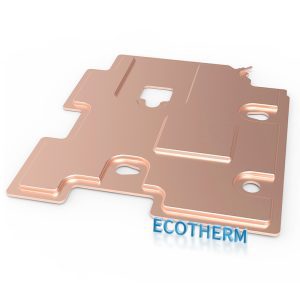
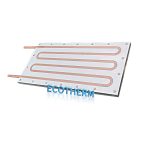
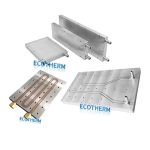
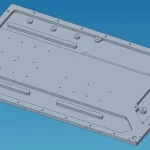
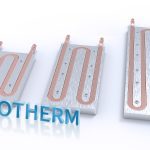
Cold Plate
Cold plate heatsinks use liquid to take heat away. They are often used in industrial LED lights where power and reliability are important.
Used in big, cost-sensitive industrial lighting jobs
Extruded aluminum cold plates are common for good cooling and low cost
Custom cold plates cool high-power LEDs in tough places
Internal fins and tubes help move heat better
Some cool both sides at once, saving space
Cold plates are best for hard jobs where air cooling is not enough.
Polycarbonate and Specialty Types
Polycarbonate and special plastic heatsinks use plastics that carry heat. These are lighter than metal and do not rust. They can be made in many shapes and often cost less to make.
They do not move heat as well as aluminum, but they work for many LED uses. Plastics can be molded into complex shapes and put right on LED parts. This means fewer pieces and saves time. Some types are much stronger than regular plastics. These heatsinks are good for projects that need to be light, have special shapes, or cost less.
Note: Metal heatsinks cool better, but polycarbonate types are tough, easy to make, and allow for creative designs.
Application Examples
Indoor Lighting
Indoor LED lights can get hot, especially in closed spaces. Engineers figure out the junction temperature by looking at room temperature, power used, and thermal resistance of the LED and heatsink. If the room is 60°C and resistance is high, the LED can reach 125°C. This makes the light dimmer and shortens its life from 80,000 to 30,000 hours. Picking a heatsink with 5 to 15 K/W resistance helps keep LEDs working well. Good heatsinks, smart PCB design, and quality thermal materials help indoor LEDs stay cool and last longer.
Outdoor and Arrays
Outdoor LEDs must deal with rain, humidity, and water drops. Moisture can cause shorts and rust, making cooling harder. Arrays with chip-scale packages make a lot of heat in small spots, which can overheat fast. Engineers use metal-clad PCBs made of aluminum or copper to spread heat. Special methods like electro-chemical oxidation help heat move and protect from water. The right heatsink and PCB design keep outdoor LEDs bright and strong.
High-Power Installations
Stadiums and factories use powerful LEDs that need big heatsinks. Some stadium lights have thick, long aluminum heatsinks and big base plates to move heat away. Packages like LUXEON HL4X have large pads for high currents and tight clusters, helping with cooling. These designs lower inside temperatures, protect parts, and help lights last over 80,000 hours.
Compact Fixtures
Small LED fixtures need smart cooling because space is tight. Engineers pick aluminum for lightness and copper for better cooling. Advanced ways like vapor chambers and heat pipes help move heat. Putting thermal materials in the right place helps cooling. Simulation tools let engineers test designs before making them. Hybrid heatsinks, using both passive and active parts, balance cooling and noise in small spaces.
Custom Solutions
Custom heatsinks are made for special projects. Engineers start by checking space, power, airflow, and how to mount the heatsink. They use software to test ideas and make samples with CNC machines. Making heatsinks can use skived or stamped fins, or add heat pipes or vapor chambers. Custom heatsinks can have special shapes, fin layouts, and mounting styles to fit boards or old products. Working closely with clients makes sure the heatsink meets all needs.
Decision Checklist
Step-by-Step Guide
Picking the right LED heatsink takes some planning. Custom heatsinks work best for special projects. Follow these steps to make sure the heatsink fits the LED’s needs:
Set the Maximum Junction Temperature (Tjmax): Look at the LED datasheet for the highest safe temperature.
Calculate Power Dissipation (P): Figure out how much heat the LED makes when it is on.
Find Junction-to-Case Thermal Resistance (θjc): Get this number from the LED’s technical papers.
Determine Maximum Case Temperature (Tcmax): Use this math:
Tcmax = Tjmax - P × θjc.Estimate Ambient Temperature: Check or guess the temperature around the LED where it will be used.
Calculate Required Heatsink Resistance (θca): Use this formula:
θca = (Tcmax - Tambient) / Pto get the value you need.Select a Suitable Heatsink: Pick a heatsink that has the right thermal resistance and fits in the space you have.
Consider Airflow and Materials: Decide if you need fans or just air moving on its own. Choose materials like aluminum for good cooling.
Check Thermal Interface Materials: Use good thermal paste or pads to help heat move from the LED to the heatsink.
Plan for Ventilation: Make sure air can move around the heatsink to keep the LED cool.
Tip: Always pick a heatsink that matches the LED’s power and fits the space you have. Planning ahead helps you avoid problems and saves money later.
Common Mistakes
Some projects do not work well because of simple mistakes with heatsinks. Try not to make these errors so your LEDs last longer and work better:
Picking a heatsink that is too small for the LED’s power.
Using bad thermal paste or not using any, which makes heat build up.
Blocking airflow with tight covers or bad fixture design.
Choosing cheap thermal pads that cannot handle high heat.
Running LEDs with too much current, which makes them hotter.
Forgetting about high room temperatures where the LED will be.
Putting LEDs too close together, which makes hot spots.
Using closed cases with no airflow, trapping heat inside.
Not checking temperatures in important or powerful setups.
Putting drivers or other hot parts near the LEDs, adding more heat.
Note: Paying attention to these things can stop LEDs from failing early and save money on repairs. The right heatsink keeps your LED and your project safe.
Picking the right led heatsink helps LEDs stay cool and work longer. Each project is different and needs its own plan. Experts say to follow the maker’s temperature rules. Pick materials that move heat well. Use good thermal interface materials too.
Always use the decision checklist for your project.
Ask experts or use computer tools if your design is hard.
The right heatsink keeps LEDs working well and stops them from failing early.
FAQ
What factors should clients consider when designing a custom LED heatsink?
Clients need to look at the LED’s power and how much space there is. They should also think about airflow and how the heatsink will be attached. The material and thermal resistance are important too. Custom designs must fit the project’s size and cooling needs. Engineers use computer tools to test different shapes and materials.
How does a custom heatsink improve LED performance?
A custom heatsink is made for the LED’s exact needs. It takes away heat faster and keeps the LED cooler. This helps the light last longer. Good design stops color changes and early problems. Custom heatsinks can fit special spaces or lighting setups.
Can clients request specific materials for their custom LED heatsink?
Yes, clients can pick materials like aluminum, copper, or special plastics. Each material cools differently and costs more or less. Engineers help choose the best one for the project’s power, budget, and where it will be used.
How long does it take to develop a custom LED heatsink?
How long it takes depends on how hard the design is and how much testing is needed. Simple shapes might only take a few weeks. Harder or high-power projects can take months. Planning early and knowing what is needed helps finish faster.
What are the main benefits of using simulation tools in custom heatsink design?
Simulation tools let engineers check how heat moves before making the heatsink. This saves time and money. Clients get a design that fits their needs and works well in real life.