When selecting a heat sink for a led with heat sink, it’s crucial to pay attention to thermal resistance. The proper heat sink ensures your led with heat sink stays cool, protecting it from lumen loss and color shifts. Good heat management can nearly double the lifespan of a led with heat sink—from just 39,000 hours at 75°C to 90,000 hours at 50°C. Inadequate heat control may even cause a led with heat sink to fail entirely, as demonstrated when a city’s LED street lights lost over 20% brightness in only three months. Choosing the best heat sink for your led with heat sink is simple when you follow the right steps.
Key Takeaways
- Thermal resistance is crucial for LED performance. Lower thermal resistance means better heat dissipation, which protects LEDs from overheating.
- Calculate the heat output of your LED using its forward voltage and current. This helps you determine the right size for your heat sink.
- Aim for at least 3 square inches of heat sink surface area for every watt of heat generated. This guideline ensures effective cooling.
- Consider the installation environment. High ambient temperatures or humidity may require larger or custom heat sinks for optimal performance.
- Select materials wisely. Aluminum is lightweight and cost-effective, while copper offers superior thermal conductivity for high-power applications.
- Fin design impacts cooling efficiency. Choose a layout that maximizes airflow and surface area to enhance heat dissipation.
- Evaluate whether passive or active cooling is best for your setup. Passive cooling works in open areas, while active cooling is needed in enclosed spaces.
- Use a checklist before purchasing a heat sink. Confirm calculations, material choices, and environmental factors to ensure optimal LED performance.
Key Factor: Thermal Resistance
What Is Thermal Resistance
Thermal resistance measures how well a material or system resists the flow of heat. In the context of LED lighting, you use this value to understand how efficiently your led with heat sink can move heat away from the LED chip. You calculate thermal resistance as the ratio of the temperature difference (ΔT) to the electrical power (P) applied. This value tells you how much the temperature will rise for each watt of power the LED uses.
You often see thermal resistance expressed in kelvins per watt (K/W). For example, if a heat sink has a thermal resistance of 5 K/W, the temperature will increase by 5 kelvins for every watt of heat the LED produces. Lower values mean better heat dissipation.
A key part of thermal resistance is the junction-to-case thermal resistance, sometimes labeled as Rth J-C. This value shows how easily heat moves from the LED die (the tiny chip inside the LED) to the outer case. The case is where the heat sink attaches, so this step is critical for effective cooling.
Tip: Always check the datasheet for the thermal resistance values of both the LED and the heat sink. This information helps you make informed decisions when selecting a standard or custom heat sink for your application.
Why It Matters for LEDs
Thermal resistance plays a major role in controlling the junction temperature of your LEDs. The junction temperature is the temperature at the point where light is generated inside the LED. If this temperature gets too high, you risk reducing the LED’s brightness, shortening its lifespan, or even causing failure.
- The highest thermal resistance often occurs at the interface junction, where the LED meets the heat sink. High resistance here leads to higher temperatures.
- Materials closest to the heat source, such as the die attach material and the heat sink slug, have the biggest impact on thermal management. You want these materials to have low thermal resistance.
- Your goal should be to achieve the lowest total thermal resistance in your system. This keeps the junction temperature low and ensures your LED performs reliably.
When you select a led with heat sink, you must consider the total thermal path—from the LED die, through the package, and into the heat sink. If you design or choose a custom heat sink, you can optimize the shape, size, and material to achieve the best possible thermal resistance for your specific installation.
Note: Lowering thermal resistance is the most effective way to protect your LEDs from overheating and to maintain consistent performance over time.
Assessing LED Heat Dissipation
Selecting the right heat sink for your LED lighting starts with understanding how much heat your system produces. You need to know both the power your LED uses and how much of that power turns into heat. This step helps you size your heat sink correctly and avoid overheating.
Power and Heat Output
Finding Power Rating
Begin by checking the datasheet for your LED. Look for the forward voltage (Vf) and the current (If) at which you plan to operate the LED. These two values help you determine the input power. Manufacturers often list the maximum ratings, so use those for a safe calculation.
Estimating Heat
Not all the power consumed by an LED turns into light. In fact, a large portion becomes heat. You can estimate the heat output using this formula:
The heat output (Pd) is calculated as:
Pd = Vf × If × 0.85- Pd stands for the thermal power to be dissipated.
- Vf is the forward voltage.
- If is the current through the LED.
- The factor 0.85 accounts for the typical efficiency of LEDs.
Most LED lamps convert only about 30% to 50% of their input power into light. The rest becomes heat. For example, if your LED uses 10 watts, expect 5 to 7 watts to turn into heat.
Tip: Always use the maximum forward voltage and current for your calculations. This approach ensures your heat sink can handle worst-case scenarios.
A general rule for sizing is to provide at least 3 square inches of heat sink surface area per watt of heat generated. This guideline gives you a starting point for both standard and custom heat sink designs.
Application and Environment
The environment where you install your LED lighting affects how well your heat sink works. Consider these factors:
You should always assess the installation site. If you plan to use your led with heat sink in a hot or humid area, you may need a larger or specially designed custom heat sink to maintain safe operating temperatures.
Note: Properly matching your heat sink to both the LED’s heat output and the installation environment ensures long-lasting, efficient lighting.
Size and Shape Selection

Sizing the Heat Sink
Selecting the right size for your heat sink is essential for effective LED cooling. You must match the heat sink’s surface area to the amount of heat your LED produces. Larger heat sinks offer more surface area, which helps dissipate heat efficiently. This keeps your LED running at optimal temperatures and prevents performance loss.
Surface Area Tips
You can use a simple guideline to estimate the required surface area. For every watt of heat generated by your LED, provide at least 3 square inches of heat sink surface area. This rule gives you a reliable starting point for both standard and custom heat sink designs.
- Larger heat sinks increase the surface area available for heat dissipation.
- Enhanced surface area helps prevent excessive heat buildup, which protects LED efficiency and longevity.
- LEDs generate heat as a byproduct of producing light.
- Heat sinks draw away this heat, ensuring your lighting fixture lasts longer.
Tip: If you use high-power LEDs, never undersize your heat sink. Insufficient heat dissipation can cause high internal temperatures, which may reduce light output, shorten lifespan, and even affect your product’s market viability.
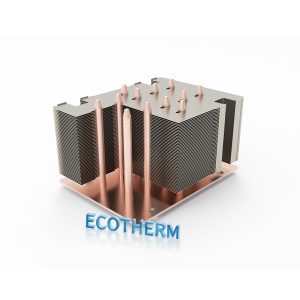
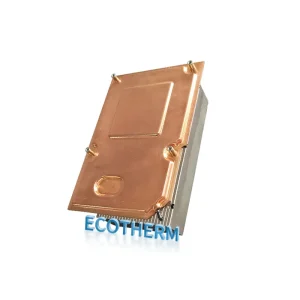
If your application requires a unique shape or installation, consider a custom heat sink. Custom designs allow you to optimize surface area and fit the available space, ensuring your LED stays cool under all operating conditions.
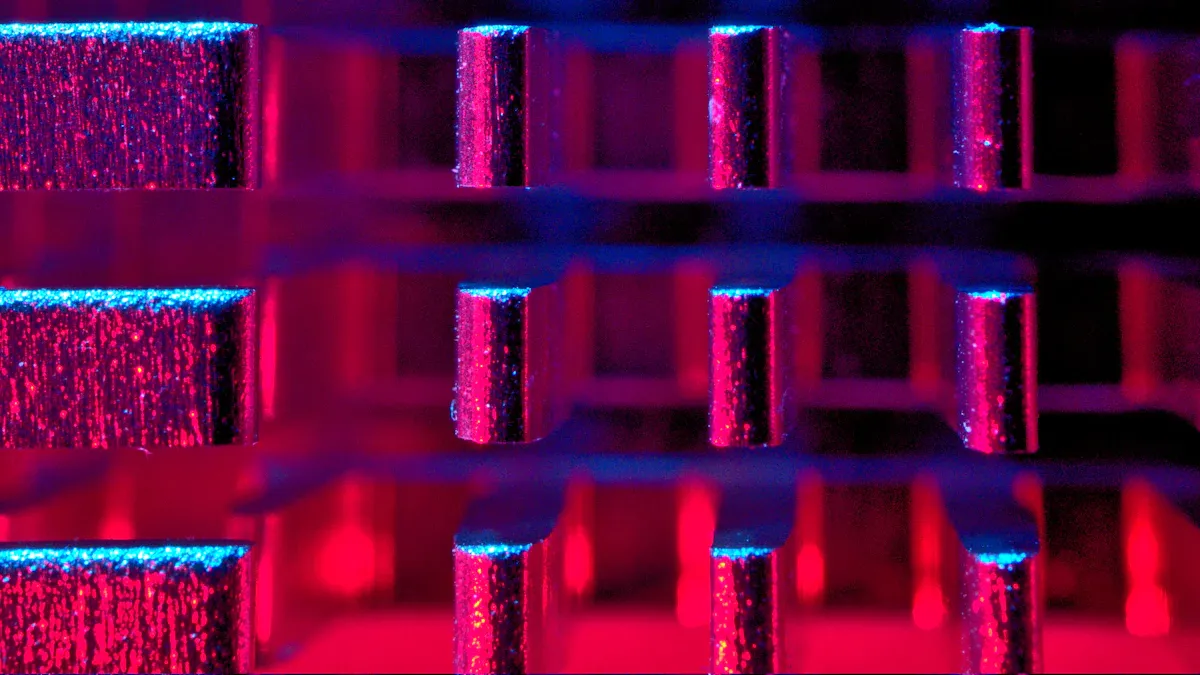
Shape and Mounting
The shape of your heat sink plays a critical role in thermal performance. Research shows that the geometry, including fin arrangements and channel designs, can enhance heat dissipation. Optimized shapes can reduce the junction temperature by up to 6% and decrease the overall size by 27%. You should select a shape that maximizes airflow and fits your fixture.
Mounting options also affect heat sink efficiency and installation flexibility. You can choose from several types:
Note: Always ensure your heat sink is securely mounted and makes good thermal contact with the LED. Using thermal interface materials can improve heat transfer and overall cooling performance.
If your installation has space constraints or special requirements, a custom heat sink can provide the ideal shape and mounting solution. Custom designs help you achieve the best thermal management for your specific LED lighting project.
Material Choices
Aluminum vs. Copper
When you select a heat sink for LED lighting, you often choose between aluminum and copper. Both metals offer excellent thermal properties, but each brings unique advantages to your application.
Pros and Cons
Aluminum stands out as the most popular choice for LED heat sinks. You benefit from its lightweight nature and lower cost. Copper, on the other hand, provides superior thermal conductivity, which can improve cooling performance in demanding environments.
- Aluminum costs less than copper. You pay about one-third the price for aluminum compared to copper.
- Aluminum weighs less. Its density is approximately 2.70 g/cm³, while copper’s density reaches 8.96 g/cm³. You handle and install aluminum heat sinks more easily, especially in fixtures where weight matters.
- Copper offers higher thermal conductivity. You achieve faster heat transfer, which can be critical for high-power LEDs or compact designs.
Tip: If you need maximum cooling in a small space, consider copper. For most general lighting applications, aluminum provides an optimal balance of performance, cost, and ease of installation.
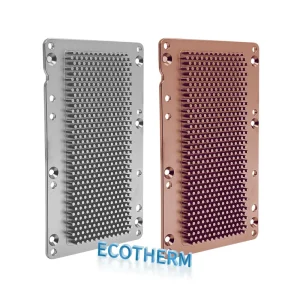
You may also explore a custom heat sink design that combines both metals. Some manufacturers use copper cores with aluminum fins to optimize thermal performance while controlling weight and cost.
Other Materials
You can choose alternative materials for specialized LED applications. These options offer unique benefits, such as corrosion resistance, electrical insulation, or compliance with safety standards.
- You may select thermal conductive PPS for fixtures exposed to moisture or chemicals. This material resists corrosion and reduces weight.
- Electrically conductive polymers work well in applications where you need both heat dissipation and electrical conductivity.
- Flame-retardant polycarbonate and TECAMID 6 FRT meet strict safety standards. You use these materials in environments where fire resistance and chemical durability are essential.
Composite and ceramic heat sinks also offer advanced cooling solutions. Aluminum heat sinks enhanced with ceramic powders can lower LED temperatures by 5–11 °C. This improvement helps you maintain performance in high-demand settings. Metal matrix composites (MMCs) allow you to tailor thermal conductivity and density for your specific needs. You can optimize these materials for semiconductor chips or ceramic substrates, especially when you require a custom heat sink for unique installations.
Note: When you design a custom heat sink, consider alternative materials to meet the demands of your LED lighting environment. You improve reliability, safety, and efficiency by selecting the right material for your application.
Design and Cooling Methods
Fin Layout
You improve the cooling performance of your LED lighting by selecting the right fin layout for your heat sink. Fins increase the surface area, which allows more heat to escape into the surrounding air. You must balance the number and arrangement of fins to maximize airflow and heat dissipation.
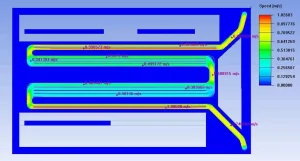
You should consider the height, length, and spacing of fins. Tall, thin, flat fins often provide better cooling and reduce pressure drop, which means air moves more freely. Flat fins maintain lower pressure drop, allowing greater mass flow of air for better cooling. The design of the fins—straight, wavy, louvered, or pin—also affects performance.
You achieve the best results by matching fin design to your installation environment. For example, radial heat sinks work well under natural convection, while pin-fin heat exchangers store more thermal energy with optimized designs. Non-uniform fin heights and distributions can maximize cooling under forced convection.
Tip: Align the fins with the direction of airflow to ensure optimal heat transfer from your led with heat sink.
Passive vs. Active Cooling
You choose between passive and active cooling methods based on your LED lighting setup and environment. Passive cooling relies on natural airflow and does not consume extra energy. You use passive heat sinks when your LEDs are installed in open areas with good airflow and minimal enclosure.
- Passive cooling is sufficient when LEDs are installed in environments with good airflow and are not enclosed.
- Active cooling is recommended in enclosed fixtures or areas with poor airflow, where heat can accumulate.
- High-performance LED setups or challenging environments often require active cooling solutions to maintain optimal temperatures.
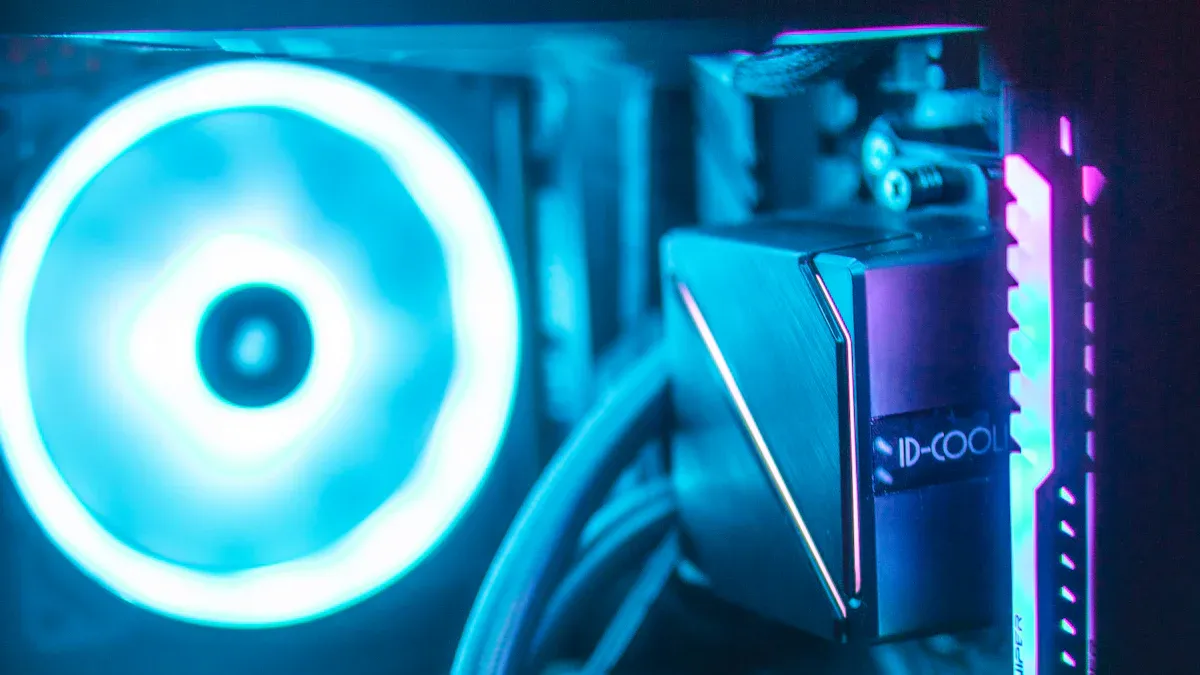
You select active cooling, such as fans or blowers, when you need to remove more heat than passive methods allow. Active cooling increases energy use and maintenance but ensures your LEDs stay within safe temperature limits in demanding applications.
Note: Always evaluate your installation environment before choosing a cooling method. Passive cooling works best for most general lighting, while active cooling suits high-power or enclosed systems.
Mounting
Mounting your heat sink correctly ensures efficient heat transfer and long-term reliability. The orientation and contact quality of your heat sink play a major role in cooling performance.
- The installation angle of heat sinks can significantly alter natural convective airflow, which is crucial for heat dissipation efficiency.
- Studies have shown that different configurations, such as inclined cross-cut fins, can optimize cooling performance based on the heat sink’s orientation.
- Research indicates that the orientation effect can lead to variations in thermal performance, necessitating careful design considerations for heat sinks in LED lighting.
You should use thermal interface materials (TIMs) like thermal paste or pads to reduce thermal resistance. Ensure direct contact between the LED chip, substrate, TIM, and heat sink. Align heat sink fins with airflow direction for optimal heat dissipation. Mount heat sinks directly to components with the highest power dissipation. For natural convection, use vertical fins; for forced convection, orient fins to match airflow.
Tip: Always check the mounting orientation and use TIMs to maximize the cooling efficiency of your led with heat sink.
Custom Cooling Devices for LED Projects
You may need a custom heat sink for unique LED lighting projects. Custom cooling devices allow you to optimize fin layout, material, and mounting for your specific requirements. You benefit from improved thermal management, better fit in restricted spaces, and enhanced reliability in harsh environments. Choose a custom heat sink when standard options do not meet your cooling needs or when your installation demands specialized shapes and materials.
For more information on custom cooling solutions, visit Custom Cooling Devices for LED Projects.
Environment Considerations
Airflow and Temperature
You must consider airflow and ambient temperature when selecting a heat sink for LED lighting. These factors directly impact the cooling efficiency and overall performance of your LED system. LEDs operate best within a temperature range of 25°C to 85°C. High ambient temperatures can push the junction temperature above safe limits, causing performance degradation and reducing quantum efficiency. You may notice lower light output even though the power input remains unchanged.
- High ambient temperatures increase the risk of overheating.
- Elevated junction temperatures decrease forward voltage and lumen output.
- Prolonged exposure to heat accelerates LED deterioration, affecting brightness and efficiency.
- LEDs rarely fail instantly; instead, their light output drops over time due to excessive heat.
You should maintain low junction temperatures to preserve LED efficiency and extend lifespan. Efficient heat dissipation is crucial for reliable operation. Prolonged heat exposure can warp internal components and lead to mechanical failures. Proper ventilation prevents heat accumulation around sensitive parts. Air circulation helps maintain optimal operating temperatures, while poor ventilation can cause thermal stress.
Tip: Position your LED fixtures in areas with good airflow. Use a custom heat sink if your installation faces unique airflow challenges or high ambient temperatures. Custom designs allow you to optimize fin layout and material for maximum cooling in demanding environments.
Active heat sinks, equipped with fans, dispel heat efficiently and enhance performance in high-powered LED settings. You should consider active cooling if your application involves enclosed spaces or limited natural airflow. Mitigating overheating risks ensures your LEDs maintain consistent brightness and longevity.
Dust and Moisture
Environmental contaminants such as dust and moisture pose significant risks to LED lighting systems and their heat sinks. Dust can accumulate on fixtures, reducing luminous efficiency and blocking airflow. Moisture may penetrate the fixture, damaging internal components and causing electrical failures. Both dust and moisture can lead to short circuits, compromising safety and operation.
- Dust buildup restricts airflow and lowers cooling efficiency.
- Moisture exposure increases the risk of corrosion and electrical faults.
- Combined dust and moisture can cause short circuits and reduce fixture reliability.
You should evaluate the installation site for potential exposure to dust and moisture. IP ratings help you determine the level of protection a fixture offers. For example, an IP65 rating guarantees the fixture is completely dust-tight and water-resistant. Selecting fixtures with appropriate IP ratings ensures long-term reliability in harsh environments.
Note: For outdoor or industrial installations, choose a custom heat sink designed to resist dust and moisture. Manufacturers can tailor materials and coatings to withstand challenging conditions, improving safety and extending the life of your LED system.
Proper heat management, combined with environmental protection, reduces the risk of mechanical and electrical failures. You safeguard your investment and maintain optimal lighting performance by addressing airflow, temperature, dust, and moisture in your heat sink selection process.
LED with Heat Sink: Calculation and Checklist
Simple Sizing Formulas
You can size a led with heat sink using straightforward formulas. Start by estimating the heat your LED produces. Use the following steps to guide your calculation:
Calculate Heat Output
Find the forward voltage (Vf) and current (If) from your LED datasheet. Multiply these values and then multiply by 0.85 to estimate the heat that needs to be dissipated.Heat Output (Watts) = Vf × If × 0.85For example, if your LED operates at 3 volts and 1 ampere:
Heat Output = 3V × 1A × 0.85 = 2.55WDetermine Required Surface Area
Use the guideline of 3 square inches of heat sink surface area per watt of heat.Required Surface Area (sq in) = Heat Output × 3For the example above:
Required Surface Area = 2.55W × 3 = 7.65 sq inEstimate Thermal Resistance
Check the maximum allowable junction temperature for your LED. Subtract the ambient temperature from this value. Divide the result by the heat output to find the maximum thermal resistance for your heat sink.Maximum Thermal Resistance (K/W) = (Max Junction Temp - Ambient Temp) / Heat OutputIf your LED’s max junction temperature is 85°C and the ambient temperature is 25°C:
Maximum Thermal Resistance = (85°C - 25°C) / 2.55W ≈ 23.5 K/WSelect a Suitable Heat Sink
Choose a led with heat sink that meets or exceeds the required surface area and has a thermal resistance lower than your calculated maximum. If your installation has space limitations or unique airflow challenges, consider a custom heat sink. Custom designs allow you to optimize fin layout, material, and mounting for your specific needs.
Tip: Always round up your calculations to provide a safety margin. This practice helps you avoid overheating and ensures reliable LED performance.
When to Consult Experts
You may encounter situations where standard sizing formulas do not address all variables. Complex installations, high-power LEDs, or harsh environments often require specialized solutions. Consult an expert if you notice any of the following:
- Your LED system operates in extreme temperatures or humidity.
- You need a custom heat sink for a unique fixture shape or mounting requirement.
- Your application involves high-power LEDs or dense arrays.
- You must comply with strict industry standards or certifications.
- You experience persistent overheating or performance issues despite following sizing guidelines.
Experts can help you model thermal behavior, select advanced materials, and design custom heat sinks that maximize cooling efficiency. You gain access to simulation tools and professional advice, ensuring your led with heat sink performs optimally in any environment.
Note: Early consultation with thermal management professionals can prevent costly mistakes and extend the lifespan of your LED lighting system.
Final Checklist
Before you purchase a led with heat sink, review this checklist to confirm your selection meets all requirements:
- Have you calculated the heat output using the LED’s voltage and current?
- Did you estimate the required heat sink surface area based on the heat output?
- Have you checked the maximum allowable thermal resistance for your application?
- Does your chosen heat sink meet or exceed the required surface area and thermal resistance?
- Have you considered the installation environment, including airflow, temperature, dust, and moisture?
- Did you evaluate the mounting options and ensure secure thermal contact?
- Have you reviewed material choices for corrosion resistance, weight, and conductivity?
- Do you need a custom heat sink for special shapes, sizes, or challenging environments?
- Have you checked for compliance with relevant safety and industry standards?
- Did you consult an expert if your application involves complex requirements or persistent thermal issues?
Use this checklist to make confident decisions and achieve optimal performance from your LED lighting system.
- Review your LED’s power and heat output.
- Choose a heat sink with the right size, shape, and material.
- Consider your installation environment and airflow.
- Use the checklist to confirm your selection.
Selecting the best heat sink, or even a custom heat sink, ensures your LED lighting performs reliably and lasts longer. You can make confident choices and achieve optimal results by following these practical steps.
FAQ
What is the main purpose of a heat sink in LED lighting?
A heat sink draws heat away from your LED chip. This process keeps the junction temperature low. You protect your LED from overheating and extend its lifespan.
How do I know if I need a custom heat sink?
You need a custom heat sink when your installation space is limited, your LED system produces high heat, or you require unique shapes and materials. Custom designs optimize cooling for demanding environments.
Can I use any heat sink for my LED fixture?
You should match the heat sink to your LED’s power rating, size, and environment. Using the wrong heat sink can cause overheating and reduce performance. Always check compatibility before installation.
What materials work best for LED heat sinks?
Aluminum offers a balance of cost and performance. Copper provides superior thermal conductivity for high-power LEDs. You may choose composite materials for corrosion resistance or special requirements.
How does fin design affect heat sink performance?
Fin design increases surface area and improves airflow. Straight fins suit most applications. Wavy or pin fins enhance cooling in compact or high-power setups. You should align fins with airflow for best results.
Do I need active cooling for my LED lighting?
You need active cooling, such as fans, in enclosed spaces or high-power LED systems. Passive cooling works well in open areas with good airflow. Evaluate your environment before choosing a cooling method.
How do I maintain my LED heat sink?
Clean dust from fins regularly. Inspect for corrosion or moisture damage. Ensure secure mounting and good thermal contact. Maintenance helps your heat sink perform efficiently and protects your LED investment.
What factors should I consider before ordering a custom heat sink?
Review your LED’s heat output, installation environment, available space, and required certifications. Consult experts for complex projects. Custom heat sinks provide tailored solutions for unique lighting needs.