When you choose a led heat sink, you should think about a few important things. These are thermal needs, size, material, airflow, compatibility, thermal resistance, interface material, finish, and where you will use it. The type, shape, and size are all important. Aluminum is good for most projects because it is light and not expensive. Copper can handle more heat but it costs more and is heavier. Make sure the heat sink fits your space and works with your LED. Do not stress about hard words—just pick what works best for you.
Key Takeaways
LEDs generate a lot of heat. A good heat sink keeps them cool, helping them shine brighter and last longer.
Choose the right material for your heat sink. Aluminum is lighter and cheaper, while copper cools better but is heavier and more expensive.
Check the thermal resistance of your heat sink. Lower resistance means better cooling for your LED.
Ensure good airflow around your heat sink. This helps remove heat and keeps your LED working well.
Always use thermal interface material (TIM) between the LED and heat sink. It helps heat transfer and prevents overheating.
Why Heat Sinks Matter
LED Heat and Performance
Many people think LEDs do not get hot. But LEDs actually make a lot of heat. If you do not control this heat, the LED can get dim and waste energy. More than half of the energy in an LED turns into heat, not light. When the LED gets too hot, it cannot shine as bright or work as well. Look at the table below to see how heat changes how LEDs work:
Evidence Description | Key Findings |
|---|---|
Heat generation in LEDs | 55% of energy is lost as heat, which makes LEDs work worse. |
Junction temperature impact | Higher junction temperatures make LEDs not last as long. |
Design considerations | Good thermal management helps LEDs work better and last longer. |
A led heat sink moves heat away from the LED. With a good heat sink, the LED stays cooler and works better. You get more light for your power, and your LED keeps its color and brightness for a longer time.
Lifespan Protection
Heat does not just make LEDs work worse. It also makes them die sooner. If the inside of the LED, called the junction temperature, gets too hot, the LED can break much faster than you want. Here is what happens if you do not control the heat:
Key Factors | Description |
|---|---|
Junction Temperature | Higher junction temperatures make LEDs lose light and not last as long. |
Cooling Systems | Not enough cooling and high heat can change the LED’s color and make it die fast. |
Thermal Factors | Many thermal factors, like thermal resistance, change how well high-power LEDs work. |
Bad thermal management causes lots of problems. The parts inside the LED can break down. Wires can snap, and the circuit can stop working. Even the driver that gives power to your LED can break if it gets too hot. Here are some common reasons LEDs fail:
Cause of Failure | Explanation |
|---|---|
Packaging material degradation | Using LEDs outside their rated conditions can damage materials and change the color. |
LED failure | Heat can make wires inside the LED break. |
Circuit failure | Heat can hurt solder joints and cause electrical problems. |
Driver failure | Too much heat dries out parts in the driver, so it stops working. |
Overheating Issues | Bad thermal management makes LEDs work worse and not last as long. |
Device Self-heating | Extra heat makes LEDs wear out faster and lose brightness. |
When you pick the right led heat sink, you keep your LED safe from these problems. Your lights last longer, stay bright, and help you save money over time.
LED Heat Sink Selection
Thermal Requirements
Before you pick a led heat sink, you should know how much heat your LED makes. This helps stop overheating and keeps your lights working longer. Here is an easy way to check your thermal needs: First, find out the highest temperature where you will use your LED. For example, outside air might be 30°C, but inside a lamp, it could be 50°C or more. Next, look at your LED’s details. You need to find the forward current, forward voltage, and the highest temperature the LED can handle. Some LEDs, like the Cree XM-L Easy White, can go up to 150°C at the junction. Then, figure out how much heat you need to move away. Look at the thermal resistance of each part and make sure the total is below the LED’s max temperature.
Tip: If you have a 60W LED, take the LED’s max temperature and subtract the room temperature. Divide that number by the wattage. This tells you the highest thermal resistance your heat sink should have. Try to pick a heat sink with even less resistance to be safe.
Thermal Resistance
Thermal resistance shows how well your led heat sink moves heat away from the LED. Lower numbers mean better cooling. You want to keep the LED’s junction temperature low. This helps your LED last longer and shine brighter.
Parameter | Description |
|---|---|
Tj | Maximum junction temperature of the LED |
Ta | Air temperature around the heat sink |
θjc | Thermal resistance of the LED COB module |
θca | Thermal resistance between the LED case and air |
θb | Thermal resistance between the LED case and heat sink |
θs | Thermal resistance of the heat sink |
P | Power to be moved from the LED module |
Example | LPF6050-ZHC has θs of 4.0°C/W; LPF6768-ZHP has θs of 2.1°C/W |
A lower thermal resistance means your LED stays cooler. This helps your LED last longer and keeps its color and brightness. You can use things like nano-silver paste or special thermal interface materials to lower resistance even more.
Size and Surface Area
You might think a bigger heat sink always works better, but that is not true. The design and shape matter more than just size. A well-designed led heat sink with the right structure can cool your LED better than a large, bulky one. A larger surface area does not always mean better cooling. A smaller surface area does not always mean poor cooling. The way the heat sink is built is more important than just its size.
Here is a quick look at the minimum surface areas for different LED power levels:
Power Dissipation (W) | Minimum Surface Area (sq in) |
|---|---|
1 | 10 |
3 | 12 |
1 | 1 |
Note: Always check the design and airflow around your heat sink. Good airflow helps a lot with cooling.
Interface Materials
The material between your LED and the heat sink matters a lot. This layer, called a thermal interface material (TIM), helps move heat from the LED to the heat sink. If you use the wrong material or put it on badly, you can trap heat and hurt your LED.
Type of TIM | Pros | Cons |
|---|---|---|
Thermal Greases and Pastes | High thermal conductivity, fills gaps well | Can be messy, hard to apply, may dry out |
Thermal Pads (Silicone Pads) | Easy to use, good for insulation | Not as good at moving heat, can be thick |
Phase Change Materials (PCMs) | Low resistance, clean, easy to rework | Needs certain temperatures to work, can move out of place |
Graphite Materials | Great at spreading heat sideways | Not as good up and down, can break |
The right TIM helps heat flow from the LED to the heat sink. Make sure you put it on evenly and do not leave air bubbles. This step keeps your LED cool and working well. The type, thickness, and how you put on the TIM all affect how well your LED cools. Always fill any gaps between the LED and the heat sink to stop heat from getting trapped.
Finish Quality
The finish on your led heat sink changes how well it gets rid of heat. A smooth, high-quality finish lets heat move faster from the heat sink to the air. Some finishes also protect against rust and help with cooling by radiation.
Surface Treatment | Thermal Conductivity Impact | Emissivity Rating | Corrosion Resistance | Typical Applications |
|---|---|---|---|---|
Bare Aluminum | Excellent (Baseline) | Low (0.04-0.06) | Poor | Indoor, controlled environments |
Anodizing (Clear) | Good (5-8% reduction) | Moderate (0.7-0.8) | Very Good | General electronics, consumer devices |
Anodizing (Black) | Good (5-8% reduction) | Excellent (0.9+) | Very Good | Outdoor, radiation cooling |
Chromate Conversion | Very Good (2-3% reduction) | Moderate (0.5-0.6) | Excellent | Marine, industrial equipment |
Alodine | Very Good (2-3% reduction) | Moderate (0.5-0.6) | Good | Aerospace, military |
Powder Coating | Fair (10-15% reduction) | Very Good (0.8-0.9) | Excellent | Outdoor, decorative |
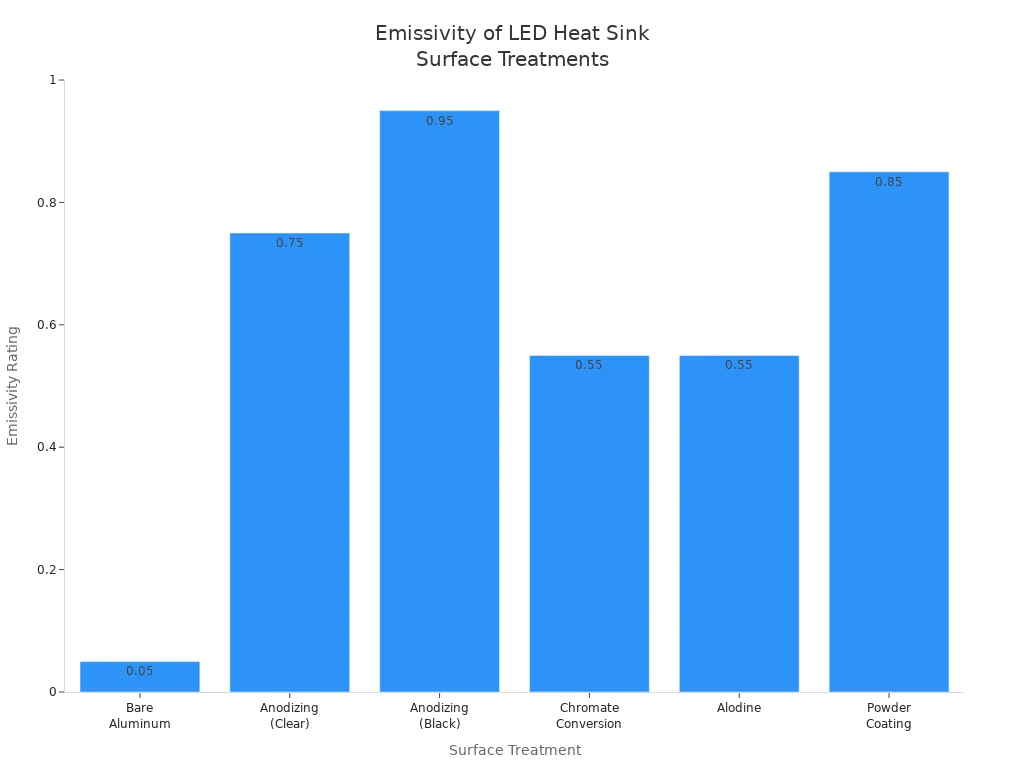
A black anodized finish gives your heat sink a high emissivity. This means it can get rid of heat better by radiation. Bare aluminum does not work as well for this. If you use your LED outside or in tough places, pick a finish that fights rust and helps cooling.
Tip: A rough surface can slow down heat transfer. A smooth, well-finished heat sink helps your LED stay cool and last longer.
Material and Airflow
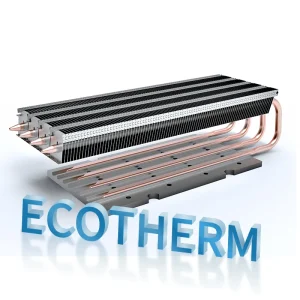
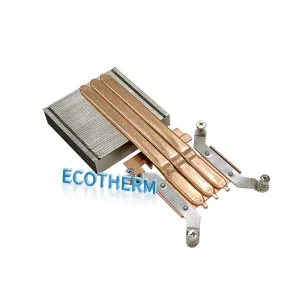
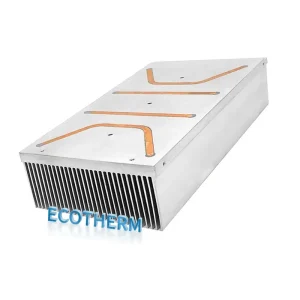
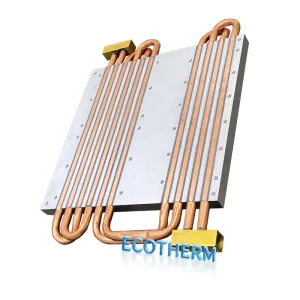
Aluminum vs. Copper
When you pick a material for your led heat sink, you usually choose between aluminum and copper. Both metals move heat well, but they have some big differences. Copper can move heat faster than aluminum. You can see the numbers in the table below:
Material | Thermal Conductivity (W/mK) |
|---|---|
Aluminum | 237 |
A6061 Aluminum | 167 |
A6063 Aluminum | 167 |
Copper | 400–401 |
Copper works better at moving heat, but it is much heavier and costs a lot more. Aluminum is lighter and easier to shape. Most people use aluminum because it is about one-third the price of copper. Copper can cost six times more by weight, and the total cost for a copper heat sink can be up to ten times higher because it is harder to make. If you need a light and affordable option, aluminum is the best choice for most projects.
Tip: Use copper only if you need the best cooling and do not mind the extra weight or cost.
Airflow Considerations
Airflow helps your heat sink get rid of heat. If you put your LED in a closed space, you need to think about how air moves around it. Good airflow keeps your LED cool and working longer. For the best cooling in an enclosed fixture, try to get about 25–30 CFM (cubic feet per minute) of airflow. For example, if you have a 30-watt LED and the temperature difference is 15°C, you need about 26.7 CFM.
More airflow means better cooling.
You can use fans or vents to help air move.
If you do not have enough airflow, your LED can get too hot and stop working well.
Always check the airflow when you set up your led heat sink. This step makes a big difference in how long your LED lasts.
LED Heat Sink Types
Passive vs. Active
When you pick a led heat sink, you will see two main types: passive and active. Passive heat sinks do not use any moving parts. They rely on their shape and surface area to move heat away from your LED. You do not need to worry about fans or extra power. These heat sinks are quiet and need almost no maintenance. Dust can build up, but you can usually just wipe it off.
Active heat sinks use small fans to blow air over the surface. This helps move heat away faster. You might think fans break often, but most last a long time. Problems usually happen only if water gets inside. Fans can collect dust, so you need to clean them sometimes. If you use a liquid cooling system, you should check for leaks.
Here is a quick look at the differences:
Factor | Active Heat Sinks | Passive Heat Sinks |
|---|---|---|
Maintenance | Fans need cleaning. Check for leaks. | |
Noise | Some noise from fans. | Silent operation. |
Cooling Power | Moves heat away quickly. | Good for most uses. |
Tip: If you want a simple setup, go with passive. If your LED gets very hot, active cooling might work better.
Pin Fin, Extruded, Stamped
You will also find different shapes and ways to make a led heat sink. The most common types are pin fin, extruded, and stamped.
Pin fin heat sinks have lots of small pins sticking up. This design lets air flow in many directions. You get great cooling, even if air moves sideways. Pin fin types work well in tight spaces and can handle different shapes.
Extruded heat sinks are made by pushing metal through a mold. They cost less and work well for big batches. You get steady, moderate cooling. Many LED lights use this type.
Stamped heat sinks are made by pressing thin metal sheets into shape. They are light and cheap. You might see them in small gadgets or where space is tight.
Here is how they compare:
Heat Sink Type | Thermal Performance | Common Uses | |
|---|---|---|---|
Pin Fin | Moderate | High | LED lighting, electronics |
Extruded | Low | Moderate | Consumer electronics, lighting |
Stamped | Low | Lower | Small devices, tight spaces |
You will see these types in laptops, cars, power tools, and even solar panels. Each one helps your LED stay cool and last longer.
Application Fit
Environment Factors
You want your LED heat sink to work well, no matter where you use it. The environment around your LED can change how well the heat sink does its job. Outdoor and indoor spaces have different challenges. Here are some things you should watch for:
Outdoor heat sinks face extreme temperatures. Hot summers and freezing winters can put stress on the metal and lower performance.
Indoors, you might have steady temperatures, but humidity can still cause problems. Moisture in the air can sneak into fixtures and hurt the parts inside.
Dust builds up over time. It can block airflow and make your LED less bright.
Take a look at this table to see how humidity and dust can impact your LED heat sink:
Issue | Impact on LED Heat Sinks |
|---|---|
Obstruction of Fixtures | Dust can pile up and block light, making LEDs dimmer. |
Internal Corrosion | Moisture can get inside and damage parts, causing failures. |
Short Circuits | Dust and water together can cause short circuits. |
Importance of IP Ratings | Higher IP ratings mean better protection from dust and water. |
Recommended Sealing | Gaskets and waterproof cases keep moisture and dust out. |
Tip: If you use LEDs outside or in damp places, pick a heat sink with a high IP rating and good sealing. This keeps your lights safe from water and dust.
Compatibility
Getting the right fit between your LED and heat sink makes a big difference. Sometimes, you might run into problems if the parts do not match. Here are some common issues:
The heat sink does not fit older fixtures made for bulbs.
The size or shape blocks light or does not fit the space.
Dimming systems do not work right with new LED modules.
You also need to think about how well the heat sink cools your LED. Check the thermal class rating and make sure it matches your LED’s needs. Some fixtures have different designs, so always test before you finish your project.
Compatibility Issue | Description |
|---|---|
Thermal Management | Pick a heat sink with the right thermal rating for your LED module. |
Integration Challenges | Different fixture designs can change how well your LED and heat sink work. |
To make sure you get a good fit, follow these steps:
Choose a heat sink with a large cooling surface area.
Use finned heat sinks for fans, pin array for still air.
Pick black anodized heat sinks for better cooling.
Point the fins up if you can.
Make sure the mounting surfaces are clean and flat.
Use a good thermal interface material, like double-sided thermal tape.
Press the parts together firmly during assembly.
Use epoxy adhesive if your setup might shake or vibrate.
If you check these things, your LED and heat sink will work together smoothly and last longer.
Mistakes to Avoid
Underestimating Heat
You might think LEDs stay cool, but they can get hot fast. Many people pick a heat sink that is too small or made from the wrong material. If you choose a heat sink that cannot handle the heat, your LED will not last long. Some folks grab copper because it moves heat well, but it is heavy and expensive. Aluminum works for most projects and costs less. Always check how much heat your LED makes before you decide.
Tip: Never skip the thermal interface material (TIM). If you use too little or too much TIM, heat will not move well. Apply it evenly for the best results.
Here are some common mistakes you should watch out for:
Using the wrong amount of TIM or applying it poorly
Choosing a heat sink that is too big or too small
Ignoring Airflow
Airflow matters more than you might think. If air cannot move around your heat sink, heat gets trapped. Your LED will run hot and lose brightness. Some people forget to check if the space has enough airflow. Others block the fins with wires or covers.
Always leave space around your heat sink for air to move.
Use fans or vents if your LED sits in a closed box.
Clean dust off the fins so air can flow freely.
Good airflow keeps your LED cool and bright. Poor airflow can ruin even the best heat sink.
Overlooking Fit
A heat sink that does not fit right can cause big problems. If it is too loose, heat will not move away from the LED. If it is too tight, you might damage the LED or the board. Some people forget to check if the heat sink matches the LED’s shape or the fixture’s size.
Make sure the mounting surface is flat and clean.
Press the heat sink and LED together firmly, but not too hard.
Double-check the size and shape before you buy.
A good fit means better cooling and a longer life for your LED. Take your time and get it right!
Choosing the right LED heat sink means looking at thermal needs, size, material, airflow, and fit. Match your heat sink to your project for the best results. Try these proven tips from real projects:
Add thermal vias under each LED to boost heat flow.
Good design can drop LED temperatures by 28°C, making your lights last longer.
Place vias well and connect them to copper planes for better cooling.
Review your options, follow these steps, and you will avoid common mistakes!
FAQ
How do I know if my LED needs a heat sink?
If your LED feels warm or dims after running for a while, you probably need a heat sink. High-power LEDs almost always need one. Check your LED’s datasheet for temperature limits.
Can I use any heat sink with my LED?
No, you need to match the heat sink to your LED’s size, power, and shape. If it does not fit well, your LED can overheat. Always check compatibility before you buy.
What happens if I skip the thermal interface material?
Without a thermal interface material, heat cannot move well from the LED to the heat sink. Your LED will run hotter and may fail sooner. Always use a thin, even layer for best results.
How often should I clean my LED heat sink?
You should check your heat sink every few months. Dust can block airflow and trap heat. Use a soft brush or air duster to keep it clean.
Tip: Clean more often if you use your LED in a dusty place.