How to Choose a Custom Heat Sink for Your Application
Choosing a custom heat sink starts with the device's temperature limit, not the largest available design. You need to match heat load, ambient air temperature, airflow, available space, mounting needs, and production goals. This guide shows how to work backward from those requirements.
How to Choose a Custom Heat Sink: The Decision Framework
Start with the thermal limit, then test whether the mechanical design and production plan support it. A reliable custom heat sink balances temperature, resistance, airflow, space, mounting, reliability, and cost.
| Selection factor | What to define | Why it changes the design | Typical design consequence | Who must confirm it |
|---|---|---|---|---|
| Junction temperature | Datasheet limit and target margin | Prevents overheating | Lower thermal resistance or larger fins | Component engineer |
| Power dissipation | Peak and continuous heat load | Sets required heat rejection | Thicker base or more fin area | Electrical engineer |
| Ambient conditions | Air temperature, airflow, dust, altitude | Changes convection performance | Forced airflow or wider fin spacing | System engineer |
| Available envelope | Maximum length, width, and height | Limits cooling surface | Custom profile or heat pipe | Mechanical engineer |
| Mounting | Hole pattern, pressure, TIM, orientation | Controls contact resistance | Machined base or mounting features | Mechanical engineer |
| Volume and cost | Annual units and target price | Guides production method | Extrusion, machining, or hybrid design | Manufacturing partner |
Define the Thermal Target Before Comparing Designs
Use the component datasheet first. Record power, maximum junction temperature, and junction-to-case resistance. Then calculate the allowable heat-sink resistance:
The same heat sink performs differently with still air and forced airflow. Review custom heat sink services when standard profiles cannot meet the target.
Separate Non-Negotiable Constraints From Preferences
Mark temperature, envelope, mounting, and safety requirements as mandatory. Treat finish, color, and cosmetic features as preferences. Confirm production volume before choosing custom heat sink manufacturing.
- Confirm datasheet limits
- Define worst-case conditions
- Calculate thermal resistance
- Check physical fit
- Select material
- Validate with samples
Start With the Heat Source and Its Operating Environment
A custom heat sink works only when the full heat path is clear:
Semiconductor junction → Package → Thermal interface → Heat sink → Air or liquid → Surrounding environment
The heat sink moves heat away from the device. It does not remove heat without airflow, liquid flow, or another valid rejection path.
Map the Complete Path From Junction to Ambient
- Heat load: The electrical power converted into heat. Record both continuous and peak values.
- Junction temperature: The temperature limit inside the device. Keep the design below the datasheet maximum with a safety margin.
- Ambient temperature: The air or liquid temperature around the heat sink. Use the highest expected value, not room temperature by default.
- Interface resistance: Heat loss at the package, thermal pad, grease, or mounting surface. Poor contact increases device temperature.
- Enclosure restrictions: Limited space, blocked airflow, dust, and orientation can reduce cooling performance.
Account for Peak Load, Duty Cycle, and Worst-Case Ambient Temperature
Check the device datasheet for power dissipation, junction-to-case resistance, and operating limits. Then add duty cycle, altitude, dust exposure, airflow direction, and enclosure temperature.
- Power (continuous and peak)
- Temperature limits (junction, case, ambient)
- Thermal resistance values (RθJC, RθCS)
- Interface details (TIM type, mounting pressure)
- Enclosure dimensions and airflow paths
- Fan specifications and operating point
- Orientation (vertical / horizontal)
- Altitude and dust exposure
- Ambient temperature range (worst case)
Match the Cooling Architecture, Material, and Fin Design to the Application
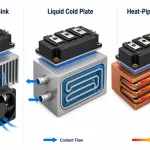
Choose the simplest design that meets the thermal target. Passive cooling suits low-to-moderate heat loads with clear natural airflow. Use a fan when airflow is weak or heat density is high. Heat pipes or vapor chambers move heat from tight spaces to a larger fin area. Liquid cold plates fit high-power electronics when air cooling cannot meet temperature limits.
| Design option | Heat-load & airflow fit | Main advantages | Main limitations | Manufacturing implications | Best-fit application |
|---|---|---|---|---|---|
| Passive fins | Low load; open airflow | Silent; simple; low cost | Needs space and airflow | Extrusion or bonded fins | Small electronics and controls |
| Fan-assisted | Medium to high load | Higher convection; compact | Noise; moving-part risk | Adds fan mounts and guards | Servers and power electronics |
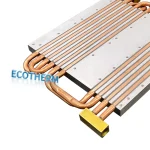
| Heat pipe or vapor chamber | Hotspots; limited space | Spreads heat across fins | More joints and validation | Requires sealed assemblies | Dense electronics and aerospace |
| Liquid cold plate | Very high load | Strong heat removal | Pump and leak risk | Channels, fittings, testing | High-power systems |
Decide When Passive Cooling Is Enough
Passive designs need adequate fin area, open spacing, and a clear convection path. If enclosure airflow is restricted, add a fan or heat-spreading device.
Choose Aluminum, Copper, or a Hybrid Construction
| Material | Thermal behavior | Weight | Cost tendency | Manufacturability | When to use it |
|---|---|---|---|---|---|
| Aluminum | Good conductivity | Low | Lower | Excellent for extrusion | Most general designs |
| Copper | Higher conductivity | High | Higher | Machining and joining | Hotspots and tight bases |
| Hybrid | Copper spreader; aluminum fins | Medium | Medium-high | Requires bonding | High performance with weight limits |
The best choice depends on airflow, space, weight, and cost. Confirm the final design with thermal testing under worst-case conditions.
Size the Solution With Thermal Resistance and Airflow Data
Use thermal resistance to set an initial target, not a final guarantee. The basic balance is Tj = Ta + P × (RθJC + RθCS + RθSA). Rearrange it to find the required sink-to-ambient resistance.
| Input | Where to obtain it | Units | Common uncertainty | Effect on required heat sink performance |
|---|---|---|---|---|
| Tj,max | Component datasheet | °C | Rated limit versus target margin | Lower target increases cooling need |
| Ta | System specification and test plan | °C | Enclosure hot spots | Higher ambient increases cooling need |
| P | Electrical design data | W | Peak load and duty cycle | Higher power requires lower resistance |
| RθJC, RθCS | Datasheet and TIM data | °C/W | Mounting pressure and contact quality | Poor interfaces reduce the heat sink budget |
- Record each input and its source
- Use worst-case power and ambient temperature
- Subtract junction-to-case and case-to-sink resistance
- Treat the remaining RθSA as a screening target
- Confirm the result with samples in the real enclosure
Avoid Airflow Assumptions That Fail Inside an Enclosure
| Condition | What to inspect | Thermal impact | Design response |
|---|---|---|---|
| Fan selection | Fan curve and pressure drop | Sets actual airflow | Check the operating point |
| Recirculation | Exhaust and inlet paths | Raises local ambient | Separate hot and cold air |
| Bypass air | Gaps around fins | Reduces fin use | Add seals or shrouds |
| Orientation | Vertical or horizontal fins | Changes convection | Test the installed position |
Document the datasheet, fan curve, geometry, operating point, assumptions, and test date. Results from unmatched conditions cannot be compared directly.
Turn the Design Into a Manufacturable and Testable Specification
A production-ready heat sink design must state thermal, mechanical, and manufacturing requirements in measurable terms. Give the supplier the heat-source location, CAD envelope, mounting points, base flatness, interface material, electrical isolation, finish, corrosion environment, safety needs, annual volume, and acceptance tests.
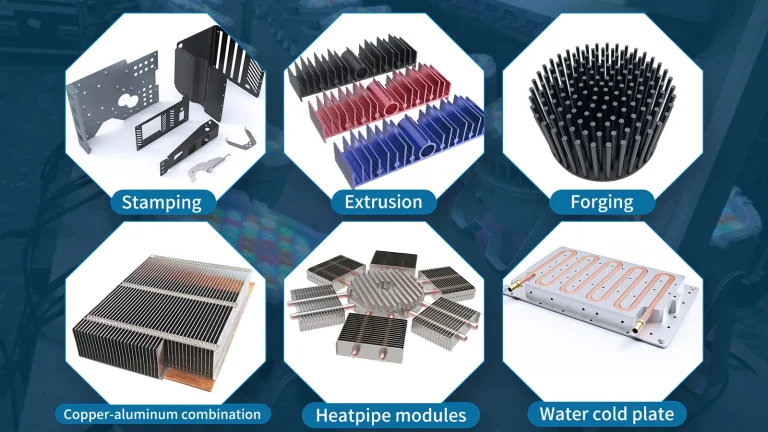
Choose a Manufacturing Method That Fits Volume and Geometry
Use extrusion for repeatable aluminum profiles and moderate volumes. Choose CNC machining for tight bases, mounting details, or low-volume prototypes. Skiving supports thin, dense fins without custom tooling. Die casting suits complex shapes and higher production volumes. Bonded fins, brazed fins, heat pipes, and vapor chambers fit compact designs with hotspots, but add assembly and validation steps.
| Requirement | Information to provide | Why it matters | Verification method | Owner |
|---|---|---|---|---|
| Thermal target | Power, ambient, limit | Sets heat-sink performance | Enclosure test | Thermal engineer |
| Geometry | CAD block, fin layout | Confirms fit and airflow | Drawing review | Mechanical engineer |
| Mounting | Holes, pressure, TIM | Controls contact resistance | Torque and flatness check | Mechanical engineer |
| Production | Volume, finish, tolerance | Sets process and cost | Supplier capability review | Buyer |
Validate Prototypes in the Final Enclosure
| Failure mode | Consequence | Prevention |
|---|---|---|
| Underspecified airflow | Poor cooling | Document fan and pressure data |
| Missing tolerances | Assembly failure | Dimension every interface |
| Excessive fin density | Blocked airflow | Test spacing with actual fan |
| Poor mounting pressure | High contact resistance | Control torque specification |
| Unvalidated TIM | Unstable thermal results | Approve TIM under real load conditions |
How Custom Heat Sink Suppliers Can Present Configurable Options With Shopify
A storefront should separate repeatable products from designs that need thermal review. This helps buyers choose faster and prevents checkout from implying that every heat sink fits every application.
Separate Standard Configurations From Engineering-Reviewed Requests
Standard Profile Buyer
Buyer type: Distributor or OEM with a known profile.
Needs to specify: Material, length, fin layout, finish, and approved secondary operations.
Storefront path: Product page with variants and clear stock or lead-time status.
Info before quote: Quantity, tolerance, mounting details, and delivery region.
Limitation: Checkout cannot confirm thermal performance for an untested assembly.
Custom Engineering Buyer
Buyer type: Engineer with a new enclosure or high heat load.
Needs to specify: Power, ambient temperature, airflow, envelope, TIM, and CAD files.
Storefront path: Quote request with file upload and engineering review.
Info before quote: Thermal target, mounting method, annual volume, and test conditions.
Limitation: The supplier must approve the design before production.
B2B Buyer
Buyer type: Purchasing team ordering repeat quantities.
Needs to specify: Company location, SKU, quantity, price tier, and purchase order details.
Storefront path: Shopify B2B catalog with customer-specific products, quantity rules, and volume pricing.
Info before quote: Approved SKU list, minimum order quantities, payment terms, and shipping rules.
Limitation: Shopify supports purchasing workflows, but does not perform thermal engineering or validate designs.
Shopify B2B supports company profiles, catalogs, quantity rules, and volume pricing. Plan limits apply, so confirm the current plan and regional setup before launch. Use Shopify after options are standardized and the engineering-review path is clear.
Key Takeaways for Selecting the Right Thermal Solution
Choosing a custom heat sink is a system decision. Review these points together:
Start with: Required power, temperature limits, ambient conditions, airflow, envelope, mounting, and production volume.
Confirm before ordering: Target thermal resistance, material, fin geometry, tolerances, interface method, and acceptance test.
Use a custom design when: Standard profiles cannot meet the thermal target, fit the enclosure, or support the mounting and production requirements.
Next action: Collect the thermal and mechanical inputs, obtain a manufacturable concept, and validate it under worst-case operating conditions before production.